Heyy all, as I had posted about a week ago, I was loving my natural hair, but I was a bit bored and wanted more versatility. I decided to texlax my hair.
Texlaxing gives similar results to texturisers and in my opinion, I had more control over how relaxed my hair would be. To texlax, one usually adds conditioner or oil to their relaxer or leaves in the relaxer for under the recommended time, to intensionally under process the hair. Texlaxing is supposed to keep some of the texture of your natural hair, while allowing you to wear it straight, curly or wavy. So insted of relaxing bone straight where hair may be subject to overprocessing, this method allows the hair to be uncoiled more safely as the relaxer works slower to process the hair.
One can choose how straight their hair would be depending on the time you leave it in and how diluted the relaxer is.
I chose to use the Organic Root Stimulator regular relaxer kit because ulovemegz from YouTube always uses this kit to relax and I love the results she gets on her hair. It was $16.99 for the regular which would have been way cheaper had I found in the beauty supply store, sadly they only had Super.

Also this kit comes with a lot of additional products, a few I was actually hoping to try out at some point. So I was very happy that it came in the kit. They were adequate sample sizes as well, so I was extremely pleased.

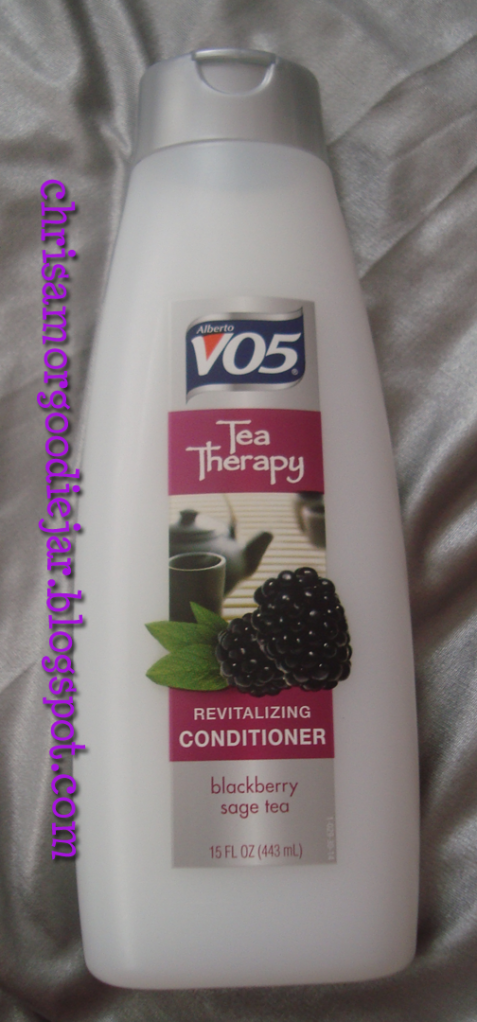
The next thing that I got was some cheap conditioner, because I really wasnt about to waste some good bucks on a conditioner that’s gonna get used up so quickly hahah. I love the VO5 conditioners, my favourite line is actually the Tea Therapy ones, they seem to work great for my hair given the price. So I picked up one of those to mix into the relaxer base. It was only $4.50 🙂
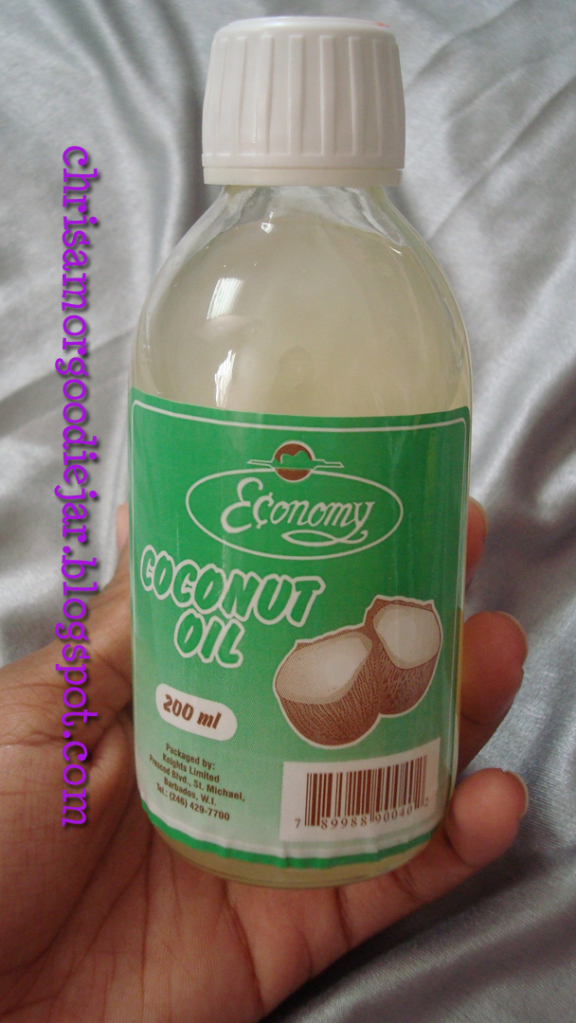
For added assurance that texlaxing would turn out the way I wanted, I researched some oils and how people use them in texlaxing. Most use Olive Oil, but that never seems to do much for my hair, save for drying it out. I hate the smell of it too, I’d rather cook with it haha. So I checked out some coconut oil which I happen to love the smell of and it’s not too thick either, which is very good for even everyday styling. I got a bottle at the pharmacy for about $6.50.
Finally, I bought some extra gloves from the pharmacy so both my sister and I would have a pair. I know how terrible it is to have mishaps with chemicals, your nails and hands may never be the same, so I definitely wanted to avoid that.
I mixed about 5 parts of the conditioner with one part coconut oil and mixd the concoction until it stopped separating. I didn’t measure exactly, just eyeballed it, but a good portion of conditioner, maybe 5-7 tablespoons. Then I added about 70% of the activator solution to the relaxer base and used the entire mixture of the conditioner and oil. Finally after stirring well I applied it to my hair from root to tip, back to front. The hair at the back of my hair always seemed to be more resistant, so despite the instructions saying from front to back I did the opposite haha. I left it in for about 7 minutes, omitting the application time. It did take longer to start processing because it was virgin hair, also as the relaxer was diluted.

As for the results, I loved them! While my hair was rinsed out my hair and shampooed my sister kept saying it looks so nice and wavy, I could’t wait to see for myself! And it was exactly that, I was so happy that I chose to texlax instead of just relax my hair.

I didn’t even get burned, which in my opinion is AMAZING! I’ve heard tons of horror stories of how bad relaxer burns and I’ve always kept away from it because of that. I did take some precautions with regards to burning. I washed my hair early in the week, since I knew I wanted to process Sunday. Also I avoided scratching my hair, I wore a satin bonnet, sectioned off my hair the day prior to the texlax and finally my sister based my scalp and hair line really well.
My hair is just as thick as it was natural but it feels weightless and more manageable. It now blows in the wind, I completely missed that feeling. My hair still looks natural and now I can fully rock a wash and go, which I’m stoked about. Before my hair would just clump together and get tangled so easily. Twistouts would be so tiresome I didn’t even bother with them. But now it holds a twist-out well and moisture also! It’s just sooo awesome ^___^. I can’t wait to try out more styles on my hair. This week I’m wearing it flat ironed. But more details on that later.


If you’d like more information on this processing technique, you can check out this blog which I owe the credit to for their comprehensive post on texlaxing. Thanks Zan & Rob! You do not know how much this has helped me.
Until next post…
XOXO