e.l.f. Brow Kit | Review

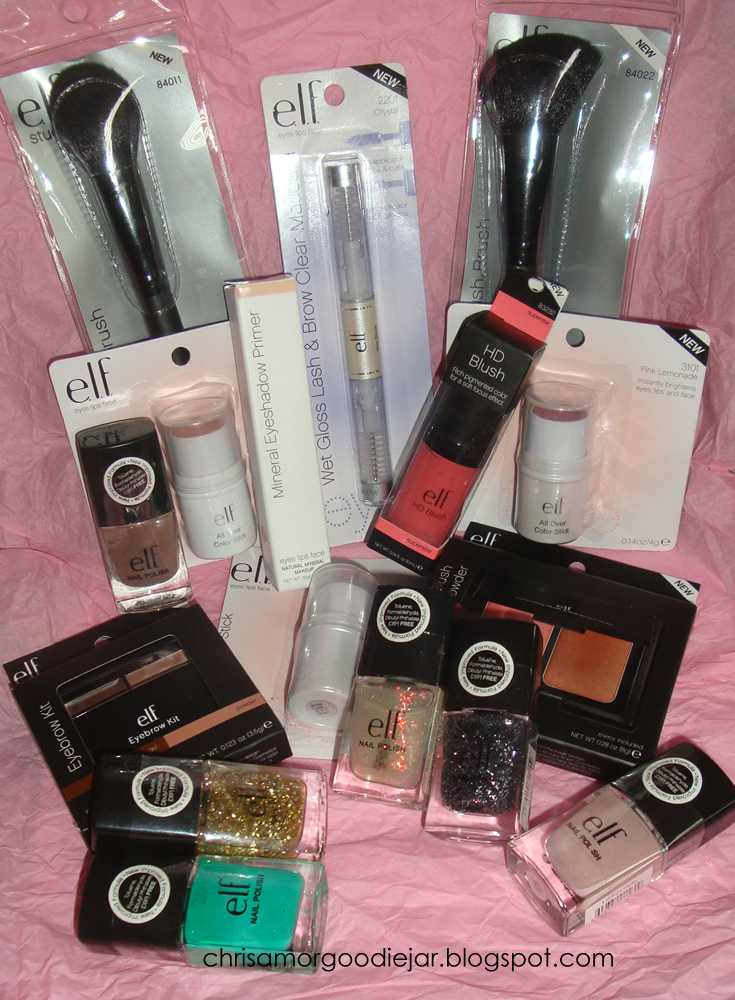
Hey all! For some reason I’ve misplaced all the product photos I’ve had for the e.l.f. Studio Brow kit in Medium, which I had for some time to review but, I’m still going to review it anyway. You’ve probably seen me mention this product in a couple of beauty favourites and also in my eyebrow tutorial and my everyday makeup routine recently.

Source

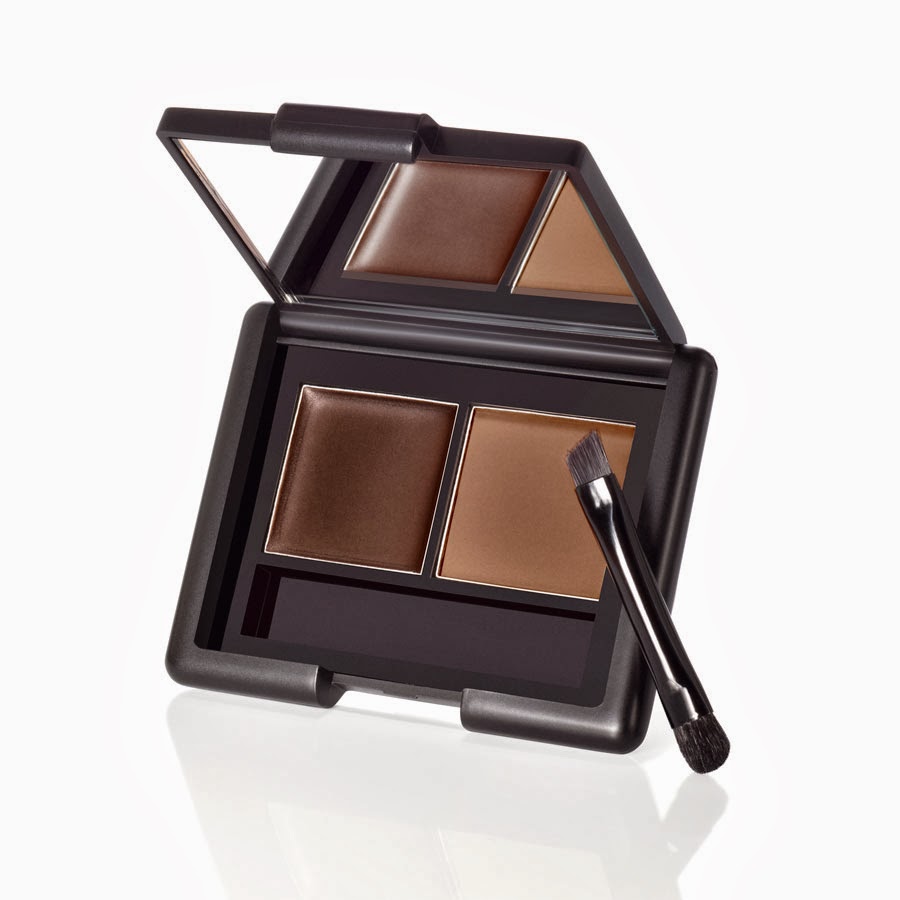
I first heard Shaanxo on YouTube (from NZ) rave about this brow kit and when I decided to order from e.l.f earlier this year, that was one of the first things I put in my cart. It definitely lives up to the hype she gave it. It lasts all day, the colour (Medium) works well with my hair colour, especially since I wear dark-rimmed glasses, so it balances out the rest of my face. I love to alternate between the powder and the brow mousse.

Taken from my eyebrow routine

The brush which comes with this is so useless though, I wish I had bought one of their brow brushes to try along with this. The one which comes with it is a dual ended mini with a thick side for the powder and a very flimsy angled end for the cream. But for the price, I really shouldn’t complain too much. this was $3USD and e.l.f. always has a promotion going on.

Taken from my Everyday makeup routine (OMG the numbers match up, not intentional!)

I use the cream some days and the powder on others, and I may even use both for longer staying power, but it doesn’t move around too much on your brows. The brow cream is waxy enough to keep my brows in place under normal circumstances. I suggest putting your shirt on first, then applying this haha. There’s also tiny mirror in this kit which is just big enough for you to see you brows and eyes. Good for on the go grooming.

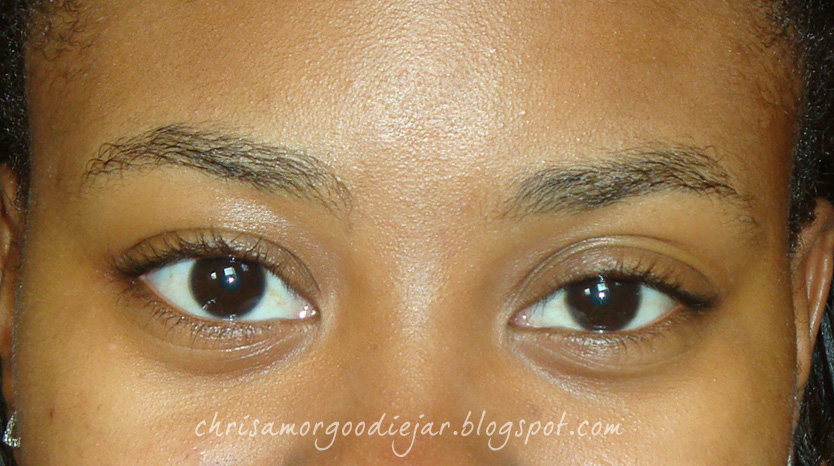
Brow done with e.l.f. Brow kit and then e.l.f. brow gel brushed through to make them look more natural.

The Verdict:

Pros:

  • Affordable
  • Pigmented powder and brow cream
  • Lasts all day
  • Cream is a good texture (waxy enough to hold brows in place)
  • Cream or Powder can be used alone or together
  • Simple yet sturdy packaging

Cons:

  • Brush provided was absolute rubbish
  • Availability in Barbados

The Raw Sugar:

Overall I’m very pleased with this little kit. It was affordable, convenient and the packaging i simple yet effective. My only annoyance was the brush provided, as it was such a dud. That should never be used with this product.

Where you can get it: e.l.f. website, Target (USA)


Disclaimer: I purchased this product with my money. Opinions are my own.

Smashbox Cream blush Dupe! | Beauty

It’s not often that I have high-end make up, but when I do, I think it’s interesting to compare the dupe-ability to the drugstore/ affordable options I might also have. Funny enough, I got this Smashbox Cream Cheek Color in the same gift set as the eyeshadow reviewed here, then when I received my e.l.f order, I realised this colour looks awfully familiar.  So I put them side by side. Looking like a dupe.. yip! It’s close! (Sadly I think the Smashbox is unavailable now.)


In the packaging they look almost the same, but when swatched they appear a bit different. Captivate (Smashbox) is a lighter peachy pink colour, but with similar undertones to Superstar (e.l.f.).

Both are a warm rose, although superstar is a bit brighter but blended out, each give a nice flushed look. They also contain some reflects, to give a bit of a glow to the skin without looking like a glittery mess.they’re also a semi-matte finish. I love that both of them are so long wearing too (4+ hours).

You would probably end up wasting more of Superstar because of the packaging, and just how pigmented even a half pump of this blush is. Like the tiniest of amounts still seems like too much. While Captivate is a bit more forgiving as it is a bit sheerer.

I like the packaging on both of these products, and couldn’t say I’d change either of them as it wouldn’t make much of a difference to the product. I use both of interchangeably, but to be brutal, I’d pick the Captivate because it’s so much easier to apply without overdosing on colour.

Disclaimer: These products were bought with my money. Opinions are my own.

My Eyebrow Routine | Beauty

Hey all, today I’m going to show you have I groom and fill-in my brows. As I said in my Beauty Weakness post, I’m no expert on brows, I struggle to keep mine looking tidy for that matter. But I do like to keep them looking as natural as possible. I have fairly thick eyebrows which taper off to almost no hair at the ends, so that is my biggest problem. Also as I wear glasses, it’s best that I fill in my brows to balance the rest of my face.  (BTW check out the WWBH, I missed out last week, but I’m all over it this week, posting early even!)

Brows AFTER

I’m really tempted to put more of an arch into my brows, but I’d rather a professional do it, because I’m certain I’m mess it up

Weirdo brows BEFORE

Some people use razors, others uses tweezers, or scissors, But I’ll show you haw I achieve my “best” brow. Let’s get to it! (Don’t forget to pin the tutorial if you like it too.)

  1. With a clean spoolie, I brush my brows upwards and outwards
  2. After I’ve done that, I take a small scissors (one specifically for brows would make it easier) and trim the hair which is too long and messes with the shape I’m going for. Previously I’d outline my brows in a white pencil to be certain of the shape, but now I can guesstimate, hahah!
  3. Pluck those stray hairs above and below your brow. I pluck some and not all because over-tweezing can cause the hair not to grow back, and I wouldn’t want that if I decided to ever change my brow shape.
  4. Start to fill in the brow. I am using a small angled brush and the e.l.f. brow kit in Medium to make short strokes (though I hardly looks like that in this photo). Anyway, you want it to look natural and not too dark compared to you hair colour. I would also use the Maybelline MasterShape eyebrow pencil, but I’m all out of it sadly. 
  5. Use a brow gel like this one from e.l.f. that’s clear to set the brows. I find this allows my artistry to last ALL day! You can also use the powder that comes in the brow kit, which I do sometimes. Depending on my mood that day. That also lasts long. 
  6. Finally, highlight underneath your brow using your favourite highlighter. I’m using LORAC On Screen Duo in Champagne and Caviar as usual. But I also like Smashbox’s Crisp eyeshadow to highlight as well. I like shimmery highlights it I’m not wearing any other eye products. 
Violà!

Besides the trimming and tweezing, I typically do my brows like this, unless it’s a special occasion and I’m wearing more face and eye make up. Do any of you ladies do the full-on concealer/ highlighted brows? What’s your take on that? I think done right it looks very good, but I just couldn’t imagine spending so much time on those when I have to be leaving home early (or in a rush).

Disclaimer: Products mentioned were bought with my money. Opinions are my own.

e.l.f. Glamour Girl polish | Swatches

Well hi there, this is a bit awkward. Would you believe me if I told you that I forgot yesterday was Wednesday?  Sometimes the brain forgets, technology doesn’t want to cooperate and there are just not enough hours in the day. But since I missed yesterday’s post, which I so gingerly painted my nails for, here it is. Swatches of this lovely nude polish from e.l.f. called Glamour Girl.

Nice name, great formula, love the colour in the bottle, but I hate it on my hands.  This is a “dead hand” nail polish if you’re my complexion. Although these pictures are taken with flash this is pretty true to colour.

It’s a taupe with the prettiest gold sparkles and surprisingly looks good in just one coat. But I did 2 coats for security. The glitter is very fine and gave me little stress, except a bit of drag as the polish dragged and I was still trying to smooth it over on the nail. But overall a very good formula for just $2USD.

I think this would probably look better on lighter skin tones, but this is just one of a few nude polishes I bought to try.

Disclaimer: I bought this product with my money. Opinions are my own.

e.l.f. All Over Color Stick | Swatches & Review

Hey all! I bought these colour sticks from the e.l.f. website a while ago because I always wanted to try them and I think there was some deal on. Trust me, they’re always a deal on the e.l.f. site, it’s hard to keep track. these are small twist up colour sticks available on the e.l.f. site for about $1USD. They’re very convenient as you don’t need a brush to apply them, and there are plenty of colours. I especially like how they look on my skin tone and give it a nice sheen.

I fell in love with Pink Lemonade and for a good part of June It was the only cheek colour I’d wear, aside from bronzer. It’s a nice bright pink for my skin tone, you can apply it with your fingers and not end up looking like a clown and it has some shimmer so it’s like a highlight too. Becareful not to blend too much. Especially when using your fingers, the product starts sticking more to your fingers and less to your face, so it looks like you aren’t wearing anything but shimmer.

The other colours I have are also lovely. I picked them after viewing a bunch of swatches so I didn’t get something that was way too pale for my brown skin. I like that they can be worn all over. I wore Toasted as a warm bronzy blush/ highlighter at some point and Golden Peaach as an eyebrow highlight as well as all over my lids another time. Of course using a primer, as the creamy consistency will crease on your lids.

these sticks are a good firm consistency that warm up to apply to the skin easily, especially with your fingers as I mentioned before. If your choose to use a brush, use a synthetic one, as these colour stick do feel a bit waxy and it would take a bit of effect to get it out of a natural hair brush.

The only thing I didn’t like and that’s about all of them was their staying power. They’re all beautiful colours, but as I was saying with blending it out too much, it just disappears. I’m a person who tends to touch their face a lot, and I think this blush possibly lasts 2-3 hours on me. I do not think that these colour sticks are waterproof either, definitely not marketed that way. So although they’re easy to apply during summer, I don’t think they last in the heat. Especially not Barbados heat. Also if you have oilier skin than mine, this may not be the product for you as it is emollient.

Pros: 

  • Affordable.. more like CHEAP!
  • Easy to apply
  • Convenient to carry around
  • Multi-purpose as it can be used on any part of face
  • Combines shimmer and colour
  • Gives healthy glow and colour
  • Faint fruity smell ( I thought it was just Pink Lemonade, but all have it)

Cons:

  • Not for oily skin or hot climates
  • Not waterproof or long lasting
  • Prone to creasing without eye primer
  • Can look overly shiny (may need setting with powder)

The Raw Sugar:

I love the colours of these colour sticks and how nicely they can be worn all over the face. Although they’re a breeze to apply (especially on darker skin), they just do not stand up long enough in my climate. I don’t know if I also need to use a face primer or set them with a powder too, but I’d rather it be hassle-free. I do like the flush of colour they give for the first couple hours, but after that  you will need to touch up. To defend e.l.f though, they don’t toot about being long lasting anyway, and it is convenient enough to carry around. I think it’s a good product, I like it!

Where you can find it: e.l.f. website (online), Target is also known to sell e.l.f products (USA)

Disclaimer: This product was bought with my own money. Opinions are my own.

College Makeup look | Beauty

Hey all! I was getting ready to take some pics for my Back to School outfits post (hopefully going up tomorrow) and I quickly created this make up look using the Smashbox eye shadow trio I talked about here. I loved how it came out. It’s so simple, yet pretty. Or so I think, you tell me.

Also let’s not forget the WWBH, click the button below!

I think this is college appropriate especially for the first day, or if you’re going out after classes. Very subtle make up. I love it.

What I used:
Smashbox Photo Finish PrimerNYX Stay Matte Not Flat Foundation in Chestnut
NYC Smooth Face Loose Powder in Translucent
Maybelline MasterShape by Eyestudio brow pencil- deep brown

e.l.f. clear mascara and brow gel
Smashbox Photo Op Eyeshadow Trio in Proof Sheet
Maybelline The Falsies Big Eyes mascara in Blackest Black
Smashbox Cream Cheek Color in Captivate
e.l.f Blush and Bronzing kit- Turks and Caicos
MAC Lipstick in Daddy’s Little Girl

Be sure to check back tomorrow for the Back to School post!

Green Fire Cracker Nails | Beauty

Recently, I was painting my nails more often. Happens almost every summer, but never lasts past summer -__-. I was very impressed with how my nails came out this time around. I know it’s summer, but why can’t I wear a darker green like this one. It’s just so pretty with the flakies too, but extremely hard to photograph! It’s also Wednesday, so you know that means it’s the Weekly Wednesday blog hop! Click the button below to visit TGL!

without flash

For this nail look, I used American Apparel’s Hunter nail polish, which is a beautiful opaque forest green polish, then topped it with one of my e.l.f glitter top coats. This one is a flaky iridescent glitter called Fairy Dust. I love it. It actually dries matte, which was shopkeeping to me and I ended up adding a top coat for the shine. Which reminds me, I need a new top coat, any good affordable options you guys know?

Oh I’m calling this Green firecracker, because the glitter flecks look so much like little flames. Don’t you think?

e.l.f. HD Blush in Superstar | Swatches

Hey everyone! I heard Judy from ItsJudyTime raving about the new (not so much now) e.l.f. HD blushes. These are like a dupe for the Make Up For Ever HD Microfinish cream blushes. No joke, these babies are highly pigmented! Shocking, especially since they’re just $3USD.

This will not be a review of these though, I’ll do one of those later when I test them out some more, but for now, here are some swatches of the awesomeness that is this blush.

This is the colour Superstar, a warm pink colour which boarders coral. It looks like it could be a dupe for the MUFE HD blush in #6 Quickie or #5 Nip Slip. But I don’t have these to show you sadly. (I’m not sure if the names of the colours have changed, but here’s swatches of  Quickie from KarlaSugar).

Anyway, enjoy my swatches and get your hands on these if you can!

Disclaimer: This product was purchased with my own money.

e.l.f. Beauty Haul! | Beauty

About a month back or so, e.l.f. had a promotion and I decided to finally pick up some products I had been lusting after for some time. I didn’t get them sent straight here to Barbados, as it costs way too much with shipping PLUS duties (story of a bajan beauty girl). Anyway, I sent it to a friend of mine and when they came in it felt like it was Christmas as it was a guess to what I was getting, I had completely forgotten. I ordered online with my sister and we got quite a lot of stuff for just $50USD. Gotta love e.l.f prices!

Here’s my haul, I got 2 new face brushes, because I literally have one powder brush and I have to use it for blush, bronzer and face powder. I got the e.l.f Studio Angled blush brush and the regular blush brush. I love the shape of them both, they seem like they’d work very well.

I also picked up some of their Essentials All Over Color Sticks, after wanting to try them for some time. I had seen some reviews on the colours and pigmentation, and as mentioned in my June Favourites, I’m head over heels for Pink Lemonade. It makes a fabulous blush/highlighter. I’ll be doing a swatch post on the ones I picked up. Also for my face, I got the raved HD blush and the Contourin g Blush and Bronzer kit. I can’t remember if the colour I have in the contour kit is the original, but I am happy that it can work on my skin tone. The blush could be a bit deeper in tone, but it just means I’d have to layer it with another.

AsI want to be more on my brow game, I picked up the Studio Eyebrow kit in Medium, which Shaanxo always uses and raves about, it was $3USD so who could really complain right? I also got the Essentials clear mascara and brow gel duo. So far I really like how well it sets my brows.

Finally I picked up a handful of nail polish, because I hardly ever paint my nails and when I do it’s the same old boring colours. Stepping out of my box, I got some pretty neutrals, lots of glitters and a gorgeous bright teal polish that I cant wait to paint my toes with!

What do you think of e.l.f. products? I find they can be pretty pricey here when the locals are retailing them, but sometimes the products are worth the buck.


Disclaimer: These products were bought with my own money.

June Beauty Favourites | Beauty

Hey all, Happy 250 Posts!  It’s almost the end of June and I have been trying out a few new products this month, so why not post about my favourites. For May, I was travelling and my favourites were almost all the same as for April, so I didn’t post about them. Tons of reviews coming on these products, I must say e.l.f. is always able to impress me with something.

Anyway first up is my Maybelline BB cream, a repeat favourite, though from the new picture tutorial coming up, I feel as if it’s not matching my skin as well as before. Still it’s great for moisture and does brighten up your skin so you somewhat put together when you head out. I recently bought some e.l.f. face products and I must say I’m impressed by the All Over Colour Stick and the new shade of the Contouring Blush and Bronzer. Pictured is the All Over colour Stick in Pink Lemonade, and the Contouring kit in Turks & Caicos.

I’ve also been trying to focus more on my brows as they are a problem area for me. I am going to try to groom and shape them more often. To fill them in, I’ve been trying out the e.l.f Studio brow kit and the Maybelline MasterDrama Brow pencil. I like them both as I don’t need a lot of product for my eyebrows to look groomed, but not too bold. The only issue I have is the almost useless brush e.l.f. provides in their kit.  You should be seeing reviews of these coming soon.

Typically I’m not a fan of eyeliner, it burns my eye, makes them water or does not last at all on my waterline.. until I got the Milani Liqui’feye, but that’s so hard to find in Black sometimes. I bought some mascara a while back from Cave Shepherd and it came with the L’Oreal Kohl liner (which is pretty old mind you), but it is so creamy and works well, even my aunt liked it. It glides on easily, is very black and does not irritate me eyes. I can use it on my waterline and to line the top of my lids with ease. Being it’s a kohl liner, it never fully sets, but it definitely does a good enough job setting to not make me look like a raccoon.

I recently got the Maybelline ColorTattoo and  like it also, I’m thinking I should have gotten another colour besides Bold Gold though, because applying it with my fingers can be a hassle, leaving gold glitters everywhere on my lid. Another Maybelline product I’m loving is their new the Falsies Big eyes Mascara. I had been a bit disappointed by the Falsies when I tried the waterproof formula, and the brush was so big for my eyes, but I love the Big Eyes. Formula and everything, so look out for a review on that soon.

Finally, I’ve been in LOVE with this blue Nicole by O.P.I. polish (as seen in my NYC Beauty haul). I’ve already worn it 2 weeks in a row, that’s a record for me. I never remove polish to apply the same one. Hardly ever. I also painted my toes in this colour. I took it off of my digits for now as my hands have been quite dry as of late, so my nails or peeling :(. But I would put back on this colour “Listen to Your Momager” in a heartbeat!